Quick Start
This section explains how to configure you device with the default settings and start collecting data. The default settings for configuration are:
- 100Hz logging
- Range ±8 g
- Start logging on sensor disconnect
This section then proceeds to cover downloading data and exporting to a CSV file with timestamps. For more in-depth instructions and explanations, please read the relevant sections of this manual.
Configure device
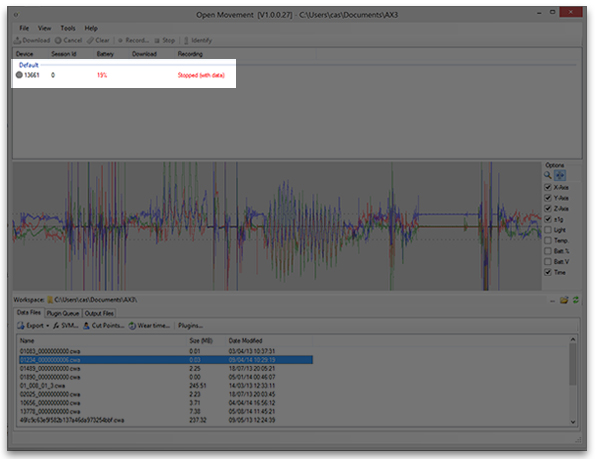
Connect the device and ensure it appears in the Device Browser Pane.
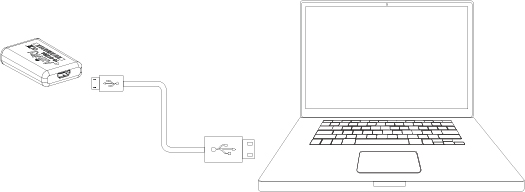
Clear any existing data
To remove any existing data that may be stored on the device, ensure the device is highlighted in the Device Browser Pane and left click the Clear button in the Device Toolbar.
Configure the sensor to record
The sensor may be set to record in a variety of ways (covered later in this manual). For default operation, the Recording Window is configured as shown.
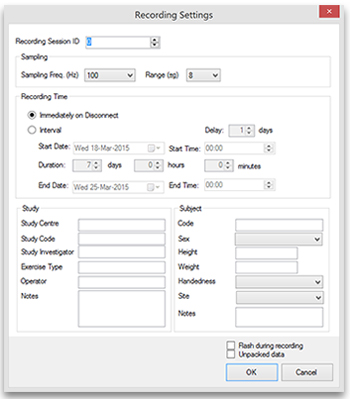
NOTE: The warning window is there to highlight any potential problems that the current settings may have on the recording.
NOTE: On clicking OK, the device time will be synchronized to the PC time
Collecting Data
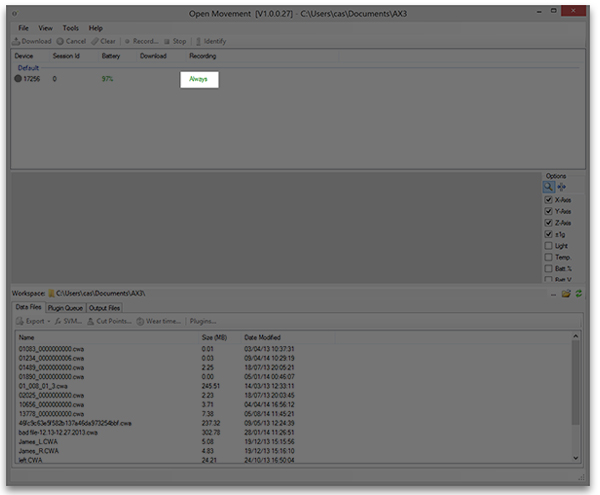
Once configured, click the OK button to set the configuration. If you keep the default settings, at this stage the device browser pane will show that the device is set to "Always" record. The device can now be disconnected and it will start recording immediately.
Downloading the data
After the recording period the next step is to download the data from the device. To accomplish this, plug the device in to the USB port of the computer and wait for it to appear in the Device Browser Pane. If the device is still configured to record on disconnect, you will first have to click the Stop button. Next, click the Download button in the Device Toolbar. The file then start to download to your working folder. Once downloaded the file will appear in the Local Files Pane.
The data file is stored in an .CWA binary format. This format is not compatible with Excel or other third party software. To get it in a more friendly format it must first be converted using the Export function.
Exporting to a comma separated value (.CSV) file
In order to use the raw data with a third-party software package, such as Excel, it must first be converted into a suitable format. This can be done using the Export Window. To instigate this, select the file in the Files Tab within the Local Files Pane and click Export button.
The following window will appear. Set the configuration as shown below and click the OK button to generate the file.
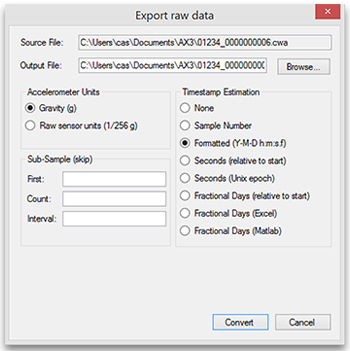
Using Exported data
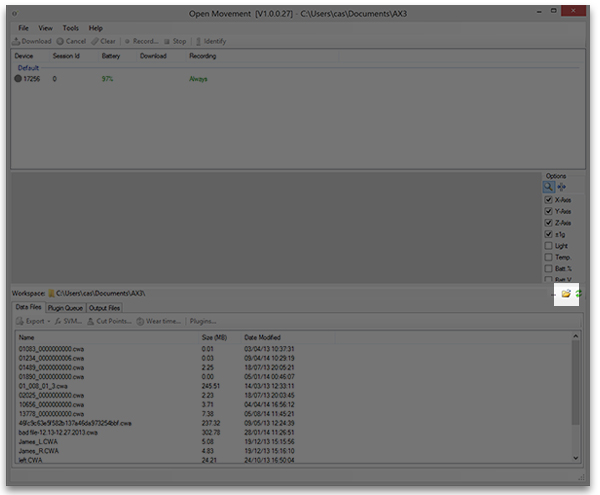
Files generated in using the Export function will appear in the Working Folder. To open the Working Folder, click the button shown below at the side of the Local Files Pane.
It is important to note that files exported to CSV format can become very large. Typically software such as Excel can only handle a few hours of data before it struggles. For multi-day recordings, the user should consider working directly with the binary files if developing algorithms, or if the user is happy with one of the existing inbuilt algorithms in the software, using summary measures. These will be covered later in this document.